Initialize Hybird HPC
Attention:This function only supports LiCO clusters whose operating system is RedHat 8.6
Install Hybrid HPC--Azure. Do one of the following:
- To deploy LiCO in local cluster:
# config EPEL repo dnf install -y https://dl.fedoraproject.org/pub/epel/epel-release-latest-8.noarch.rpm # install dnf install -y lico-core-cloudscheduling-azure- To deploy LiCO in container:
# config EPEL repo
dnf install -y https://dl.fedoraproject.org/pub/epel/epel-release-latest-8.noarch.rpm
# install dependency packages
dnf install -y openvpn easy-rsa sshpass
Modify the configuration file
/etc/lico/lico.ini.d/cloudscheduling.ini, and change the following content to the IP address and subnet mask of the LiCO management node:[CLOUDSCHEDULING] # local head node ip address/netmask # for example: # inet 10.241.57.123/24 brd 10.241.57.255 # HEAD_NODE_ADDRESS = "127.0.0.1/24" HEAD_NODE_ADDRESS = "10.241.57.123/24" # head node name # REMOTE_AGENT = "localhost" REMOTE_AGENT = "head"The LiCO management node shares
/opt/lico/cloud:echo "/opt/lico/cloud *(ro,sync,no_subtree_check,no_root_squash)" >> /etc/exports exportfs -aModify the LiCO management node slurm configuration file
/etc/slurm/slurm.conf, and add the following content at the end of the file:include /opt/lico/cloud/azure/slurm.confConfigure the autoscaling function of Hybrid HPC
Modify the value in the file
/etc/slurm/slurm.confto the following content:ResumeProgram=/opt/lico/pub/slurm/resume_script.sh SuspendProgram=/opt/lico/pub/slurm/suspend_script.shCreate resume_script.sh, suspend_script.sh, auto_scaling.sh in
/opt/lico/pub/slurm# Create the directory if it is not existed mkdir -p /opt/lico/pub/slurm# resume_script.sh #!/bin/bash /opt/lico/pub/slurm/auto_scaling.sh $1 on# suspend_script.sh #!/bin/bash /opt/lico/pub/slurm/auto_scaling.sh $1 off# auto_scaling.sh #!/bin/bash power_type=$2 echo "`date` Power $power_type invoked $0 $1" >> /var/log/lico_power_save.log hosts=`scontrol show hostnames $1` for host in $hosts;do list+=\"$host\", done list=${list%?} echo "`date` start power $power_type: $hosts" >> /var/log/power_save.log api_key="input your api key here" login_ip="input your login ip here" curl -X POST -H "Content-Type: application/json" -H "Authorization: token $api_key" -d '{"vms":['$list']}' -k https://$login_ip/api/cloudscheduling/vm/autoscaling/$power_type/ echo "`date` end power $power_type: $hosts" >> /var/log/lico_power_save.logInput your api key and login ip of LiCO in auto_scaling.sh You can get the api key by clicking Admin→API Key after logging into LiCO web portal.
Run the following command to restart the slurmctld service on the LiCO management node:
systemctl restart slurmctldCreate an Azure Authenticator:
Register an application **Attention:**Before registering the application, please check your Azure AD permissions and subscription permissions. For details,please refer to https://learn.microsoft.com/en-us/azure/active-directory/develop/howto-create-service-principal-portal
Sign in to your Azure Account through the Azure portal and select Azure Active Directory
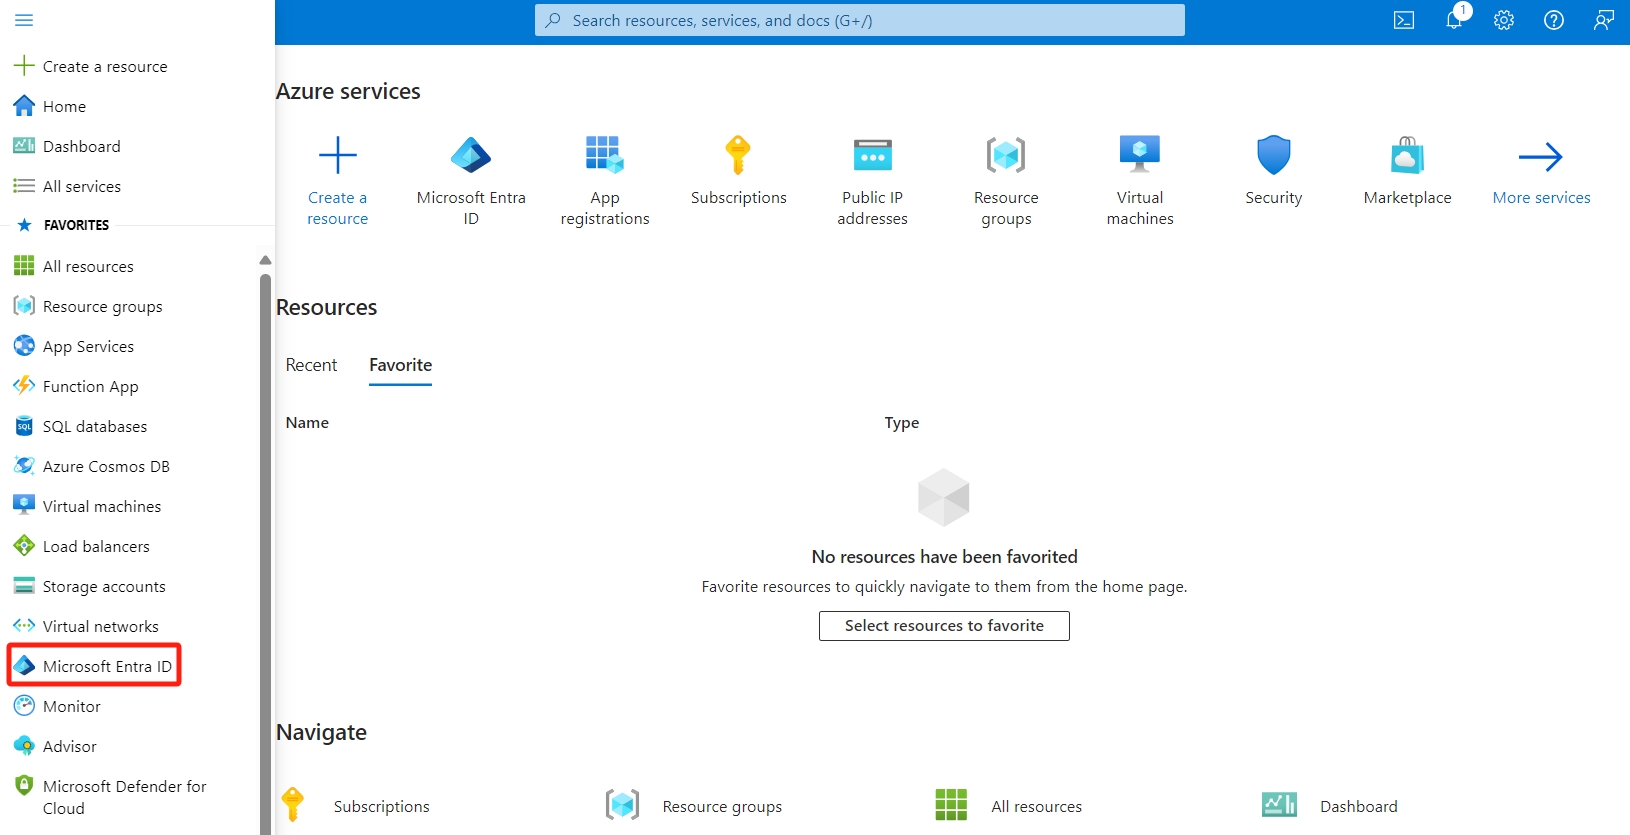
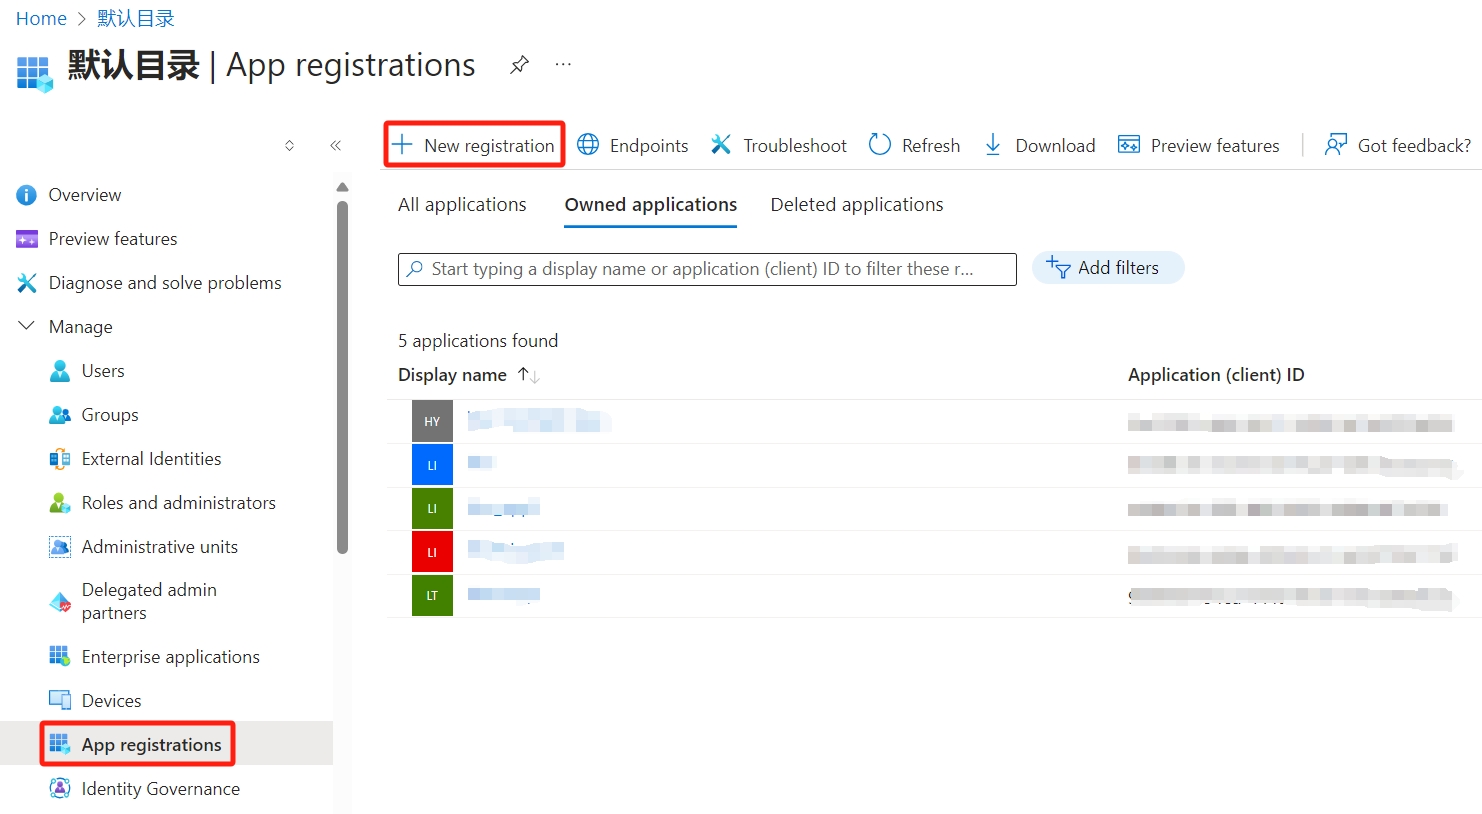
Select App registrations and Click New registration
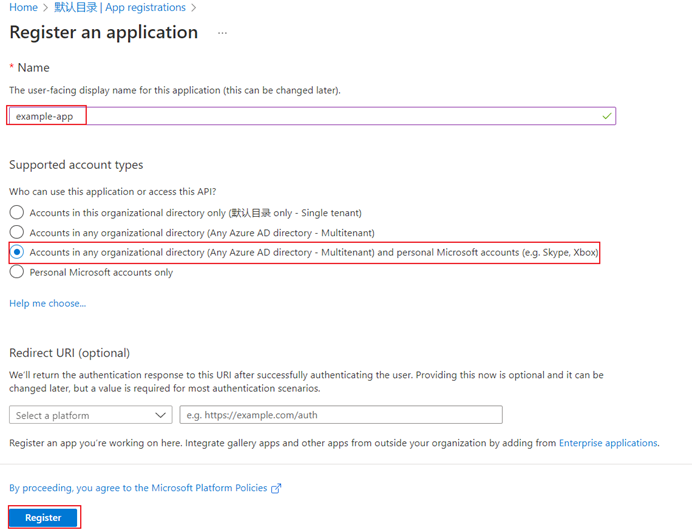
Name the application, for example example-app. Select a supported account type, which determines who can use the application. After setting the values, select Register.
After registration is complete, copy the Application (client) ID and Directory (tenant) ID and store.

Assign a role to the application
In the Azure portal, assign a role at the subscription scope, search for and select Subscriptions, or select Subscriptions on the Home page.
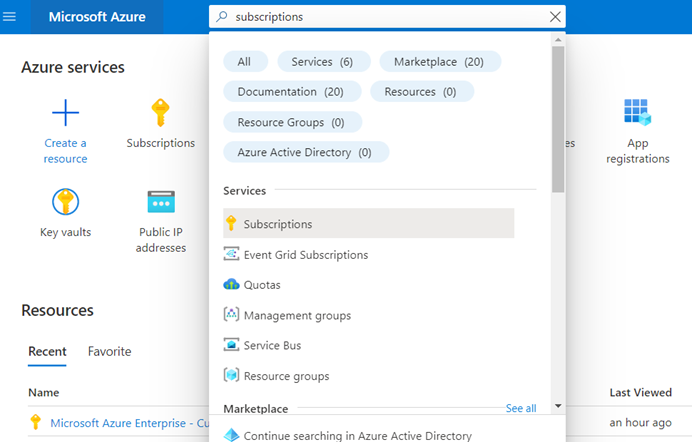
Select the particular subscription to assign the application to.

Select Access control (IAM), Select Add > Add role assignment to open the Add role assignment page.
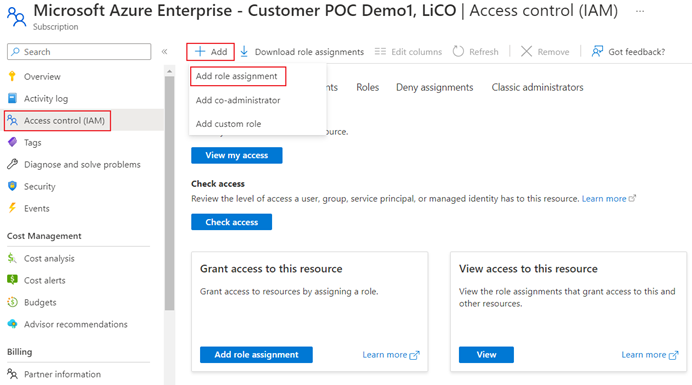
In the Role tab,select Owner

In the Members tab,Select Assign access to-> User, group, or service principal and then select Select members. By default, Azure AD applications aren't displayed in the available options. To find your application, search by name (for example, "example-app") and select it from the returned list. Click the Select button.
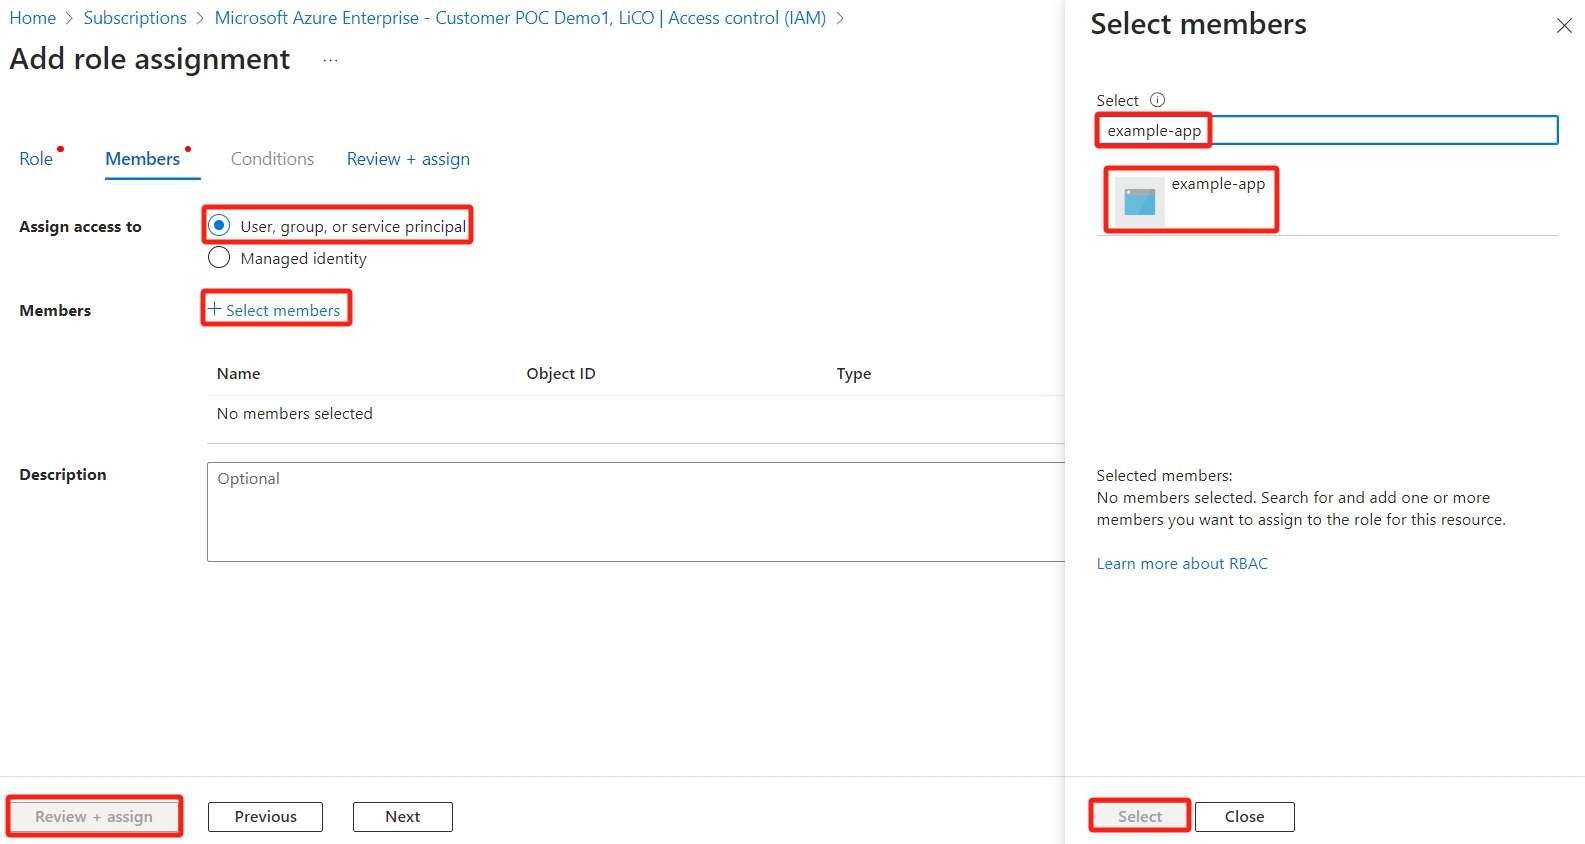
Then click the Review + assign button
Create a new application secret
Select Azure Active Directory
From App registrations in Azure AD, select your application.
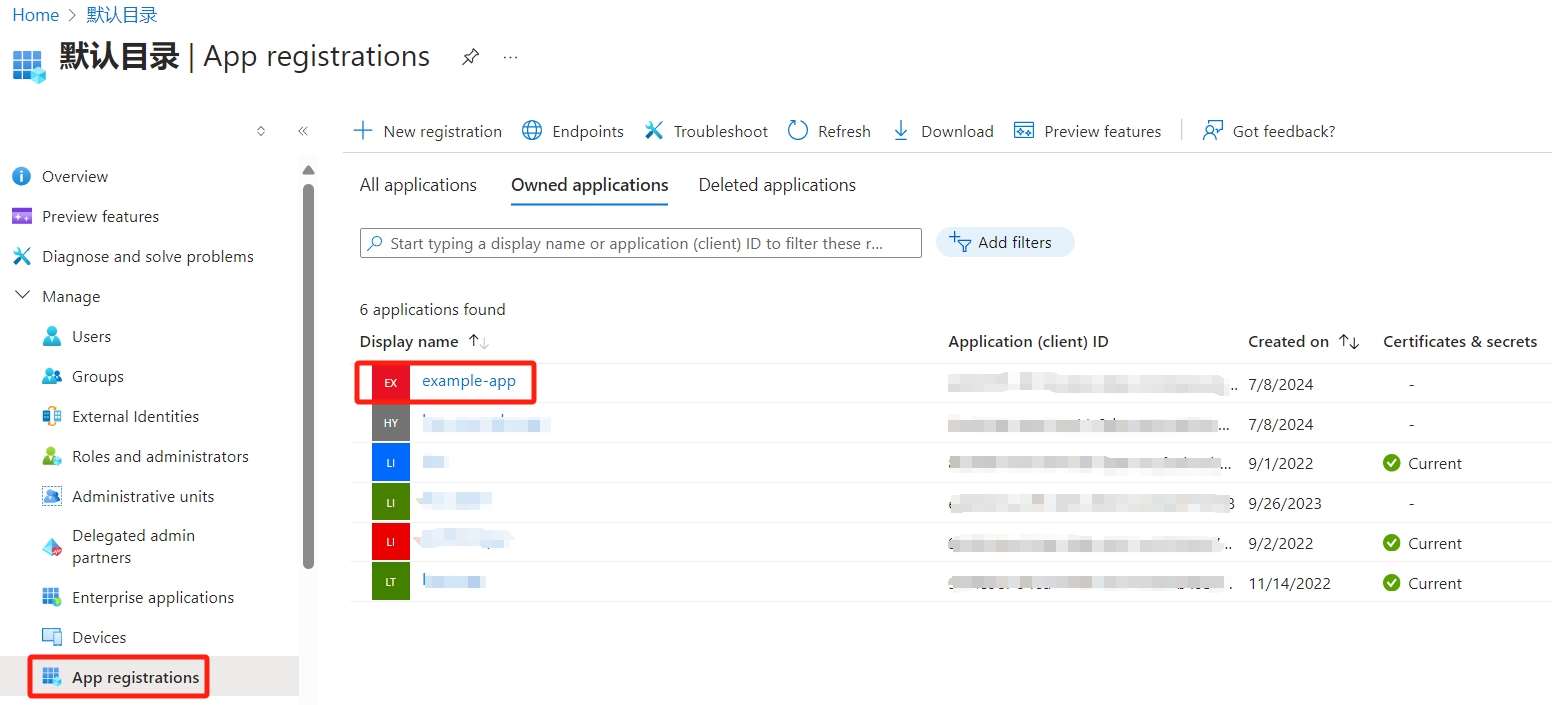
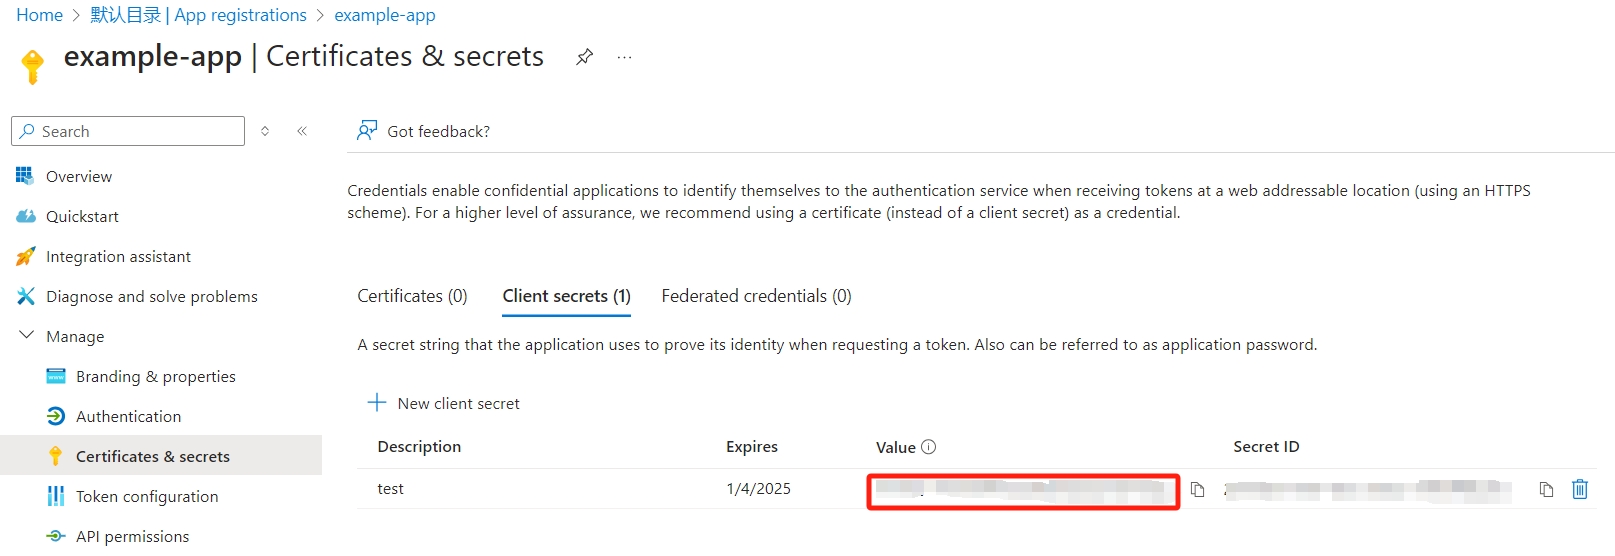
Select Certificates & secrets
Select Client secrets -> New client secret.
Provide a description of the secret, and a duration. When done, select Add.
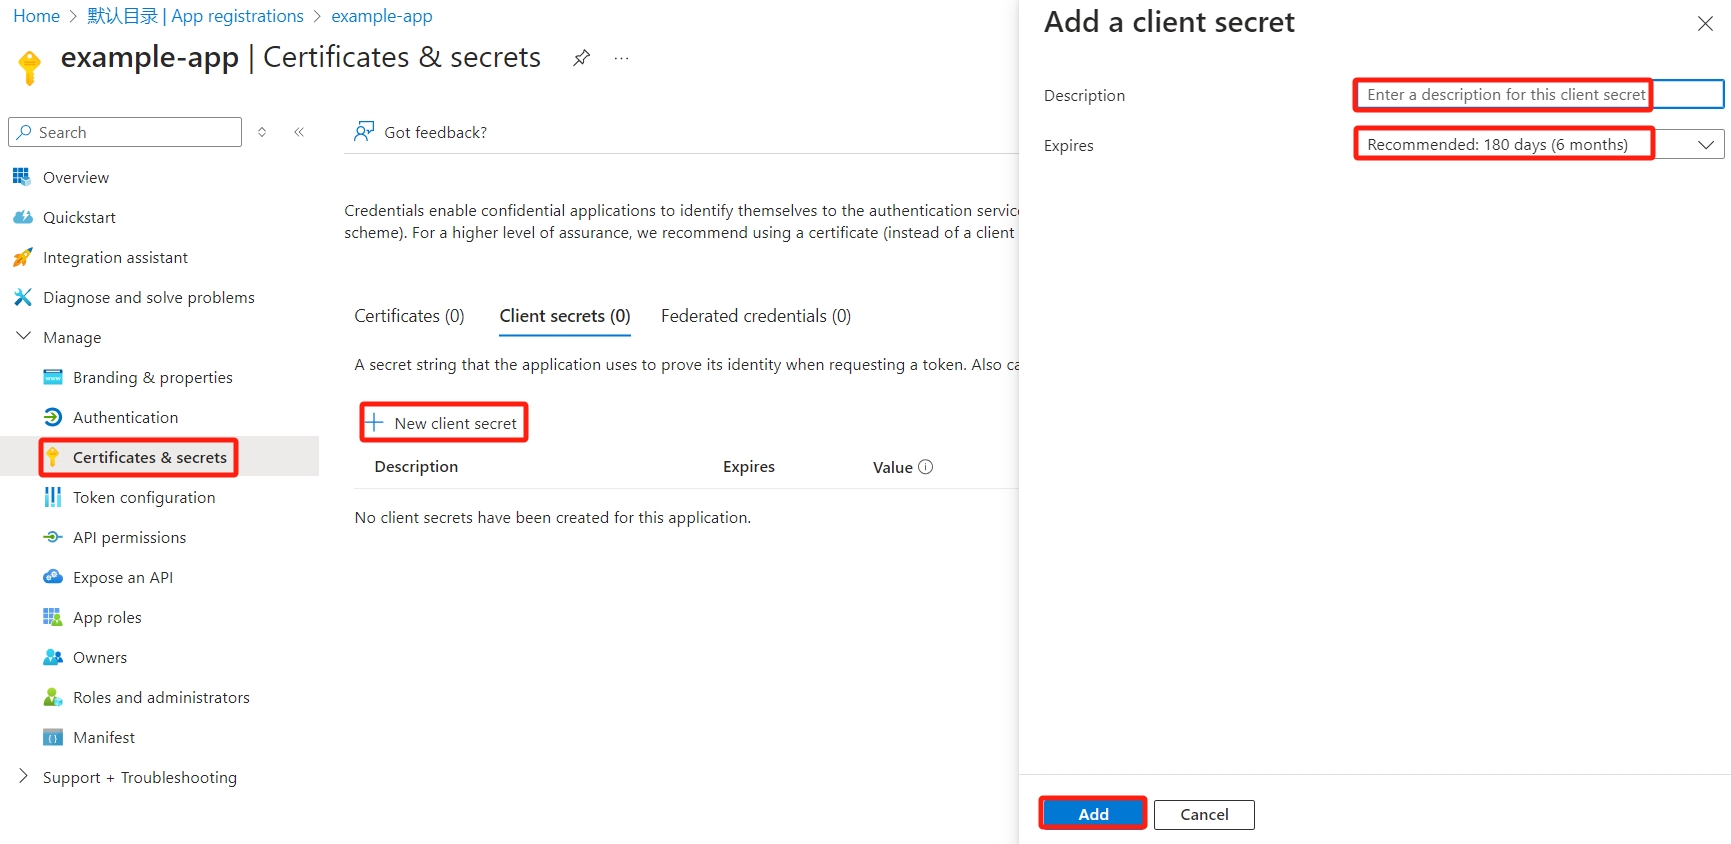
After saving the client secret, the value of the client secret is displayed. Copy this value because you won't be able to retrieve the key later.Store this value in the same location with the tenant ID and application ID.
Run the following command to import the azure authentication information into LiCO:
# Import the application (client) ID, directory (tenant) ID and client password obtained in 6.
# Follow the prompts and import them in sequence
lico azure_secret import
Create Public IP address
search for and select Public IP addresses > Create
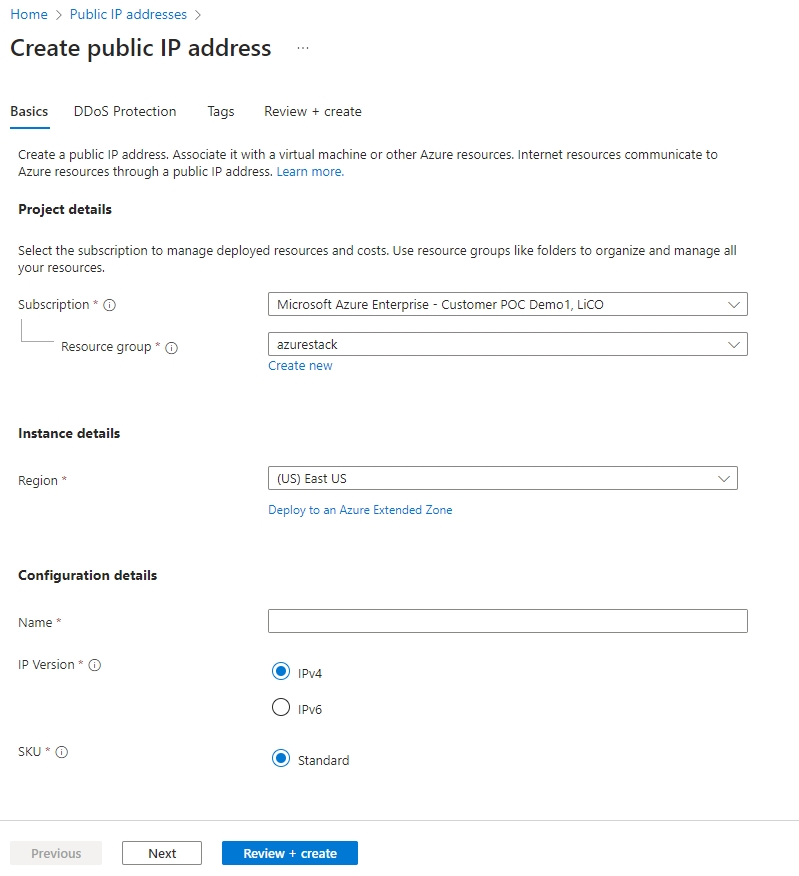
Fill in the necessary parameters according to Azure's instructions Attention:
- In the resource group option, please click the Create new button under the selection box to create a new resource group
- The default Azure location supported by LiCO 7.0.0 are: East US, West Europe, UAE North, West India, Korea Central. Please pay attention to the choice of location.
Click Create.