How to install and configure Covalent in server side
Install conda environment
Administrators need to create a conda environment for Covalent because Covalent needs the python version >=3.8. If you already have a conda environment, please skip this step.
# Install conda
cd /home
wget https://repo.anaconda.com/miniconda/Miniconda3-latest-Linux-x86_64.sh
# The installation directory should not be existed
sh Miniconda3-latest-Linux-x86_64.sh -b -p /home/miniconda3
Create Covalent environment
/home/miniconda3/bin/conda create -n covalent python=3.8Install Covalent and plugins
source /home/miniconda3/bin/activate covalent

# Install covalent
pip install covalent==0.220.0.post1

# Choose the following plugins you need to install


# covalent-aws-plugin needs to be installed first if users want to use aws-batch,aws-lambda,aws-braket,aws-ec2,aws-ecs plugins.
pip install covalent-aws-plugins==0.13.0.post1

# Install aws batch executor plugins
pip install covalent-awsbatch-plugin==0.26.0.post1

# Install aws lambda executor plugins
pip install covalent-awslambda-plugin==0.20.0

# Install aws braket executor plugins
pip install covalent-braket-plugin==0.13.0.post1

# Install aws ec2 executor plugins
pip install covalent-ec2-plugin==0.12.0.post1

# Install aws ecs executor plugins
pip install covalent-ecs-plugin==0.23.0.post1

# Install azure batch executor plugins
pip install covalent-azurebatch-plugin==0.14.0

# Install google batch executor plugins
pip install covalent-gcpbatch-plugin==0.11.0
Start Covalent service on server
# Start Covalent service
(covalent) [root@head covalent]# covalent start

# Modify the address in covalent.conf to allow the client to connect to the server
(covalent) [root@head covalent]# vi ~/.config/covalent/covalent.conf

# Replace <localhost> with "0.0.0.0" in [dispatcher]
[dispatcher]
address = "0.0.0.0" # use "0.0.0.0" to replace the localhost
port = 48008 # default port
......

# Enter :wq to exit and restart the covalent service
(covalent) [root@head covalent]# covalent restart
How to check the service is working
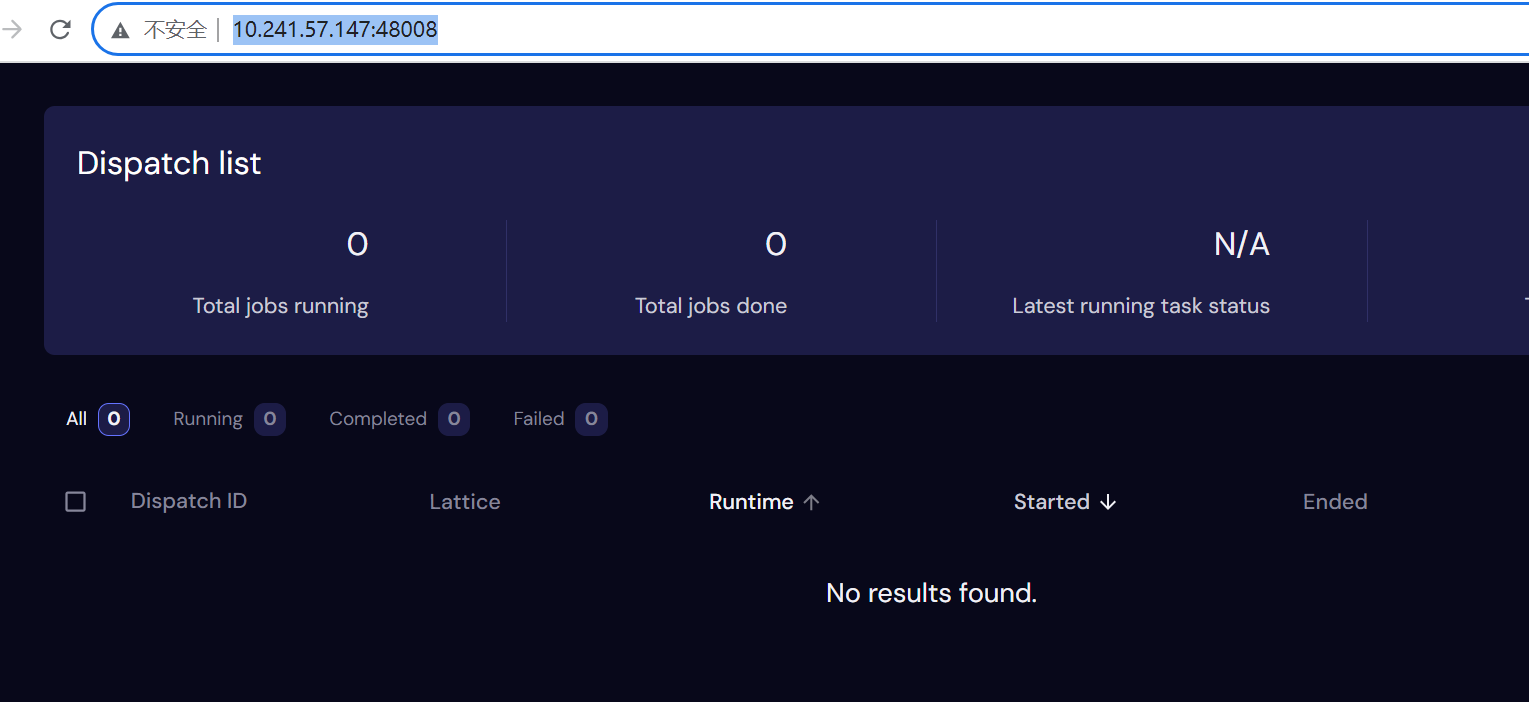
Open the url http://covalent-server-ip:port in browser and the page is like below:

Add address and port into cloudscheduling.ini in LiCO
vi /etc/lico/lico.ini.d/cloudscheduling.ini

# Add address and port into [CLOUDSHCEDULING.COVALENT]

[CLOUDSHCEDULING.COVALENT]
DISPATCHER_ADDRESS="" # covalent-server-ip
DISPATCHER_PORT=""    # covalent-server-port

# Enter :wq to exit and restart lico service
Create Runtime ENV for Covalent in LiCO
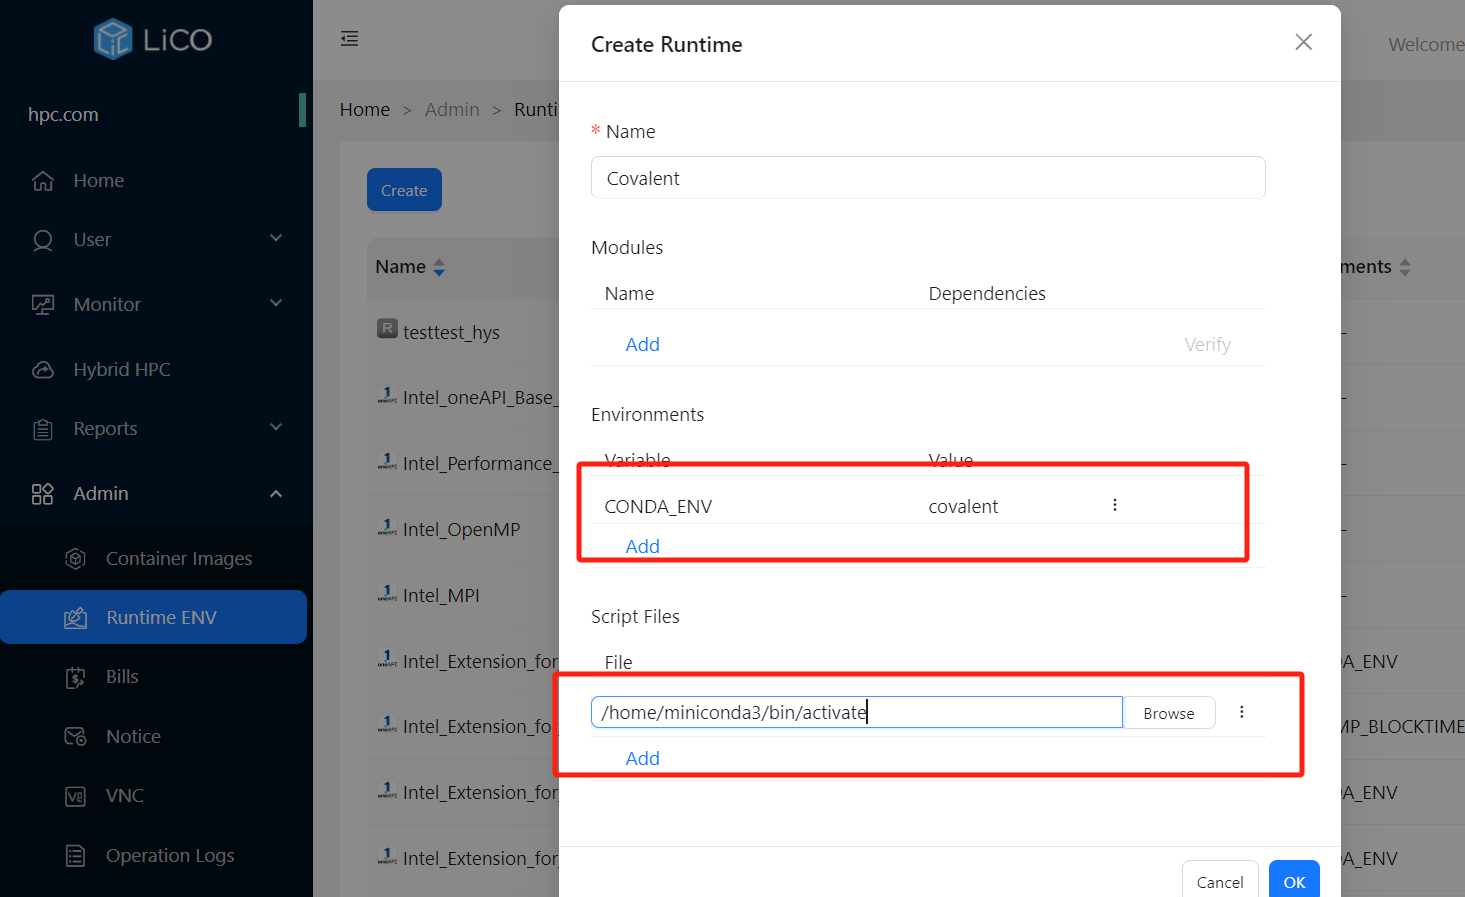
Log into LiCO as administrator, Click Admin->Runtime ENV in the left bar and click Create.

Click OK to create the runtime.
Additional steps for covalent-aws-plugins
There are some additional steps for users if you want to use covalent-aws-plugins in LiCO.
- Refer this link to install AWS CLI tool https://docs.aws.amazon.com/cli/latest/userguide/getting-started-install.html
- Set access info into aws cli
[root@head ~]# aws configure
AWS Access Key ID [None]: xxxxxxxxxxxxxxxxxxx
AWS Secret Access Key [None]: xxxxxxxxxxxxxxxxxxx
Default region name [None]: us-east-1
Default output format [None]: json
And the credential file will be saved in ~/.aws/credentials
Deploy Cloud Service
Currently covalent in LiCO only supports the Azure batch and Aws lambda cloud services.
If you need to use Azure batch Executor of Covalent, please refer Create Azure Batch for Covalent to deploy Azure batch resource.
If you need to use AWS lambda Executor of Covalent, please refer Create AWS Resource for Covalent to deploy AWS lambda resource.